First off, if you are planning to actually fly in Orbiter, I would recommend reading through all the tutorial pages,
possibly printing or taking notes from them before flying an entry following this tutorial. (My apologies for not
having a printer friendly version handy.)
For the Delta Glider mission I used for this tutorial, I set the propellant levels in the Delta Glider to the bare minimums
required for a single orbit mission and safe powered landing reserve given my current skill level at piloting the Delta Glider.
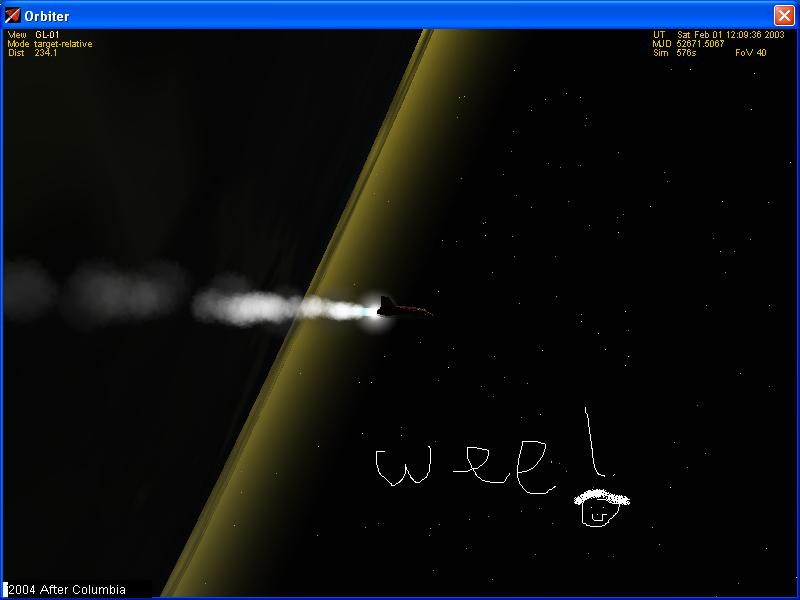
In order to save fuel, I turned the Delta Glider to head west prior to to the due east ascent, and then pitched up and
over as if executing an Immelman turn. I piloted much of the ascent heads down in a manner similar to Shuttle.
This technique is NOT RECOMMENDED FOR BEGINNERS, nor is it recommended for a fully loaded Delta Glider. I captured this
screenshot shortly before losing the ability to stabilize the craft with my hands off the controls.
All screenshots are taken using Orbiter 031217, Delta Glider Mk4, at 800*600 and all "doctoring" is in good ol' Paint.
Orbiter can be downloaded from http://www.orbitersim.com; no add-ons are needed to recreate this mission, although I would strongly recommend the sound module from http://orbiter.dansteph.com!
The DeltaGlider is capable of boost-gliding or skip-gliding all the way around the earth in the same manner as Eugen
Sanger's proposed Amerika Bomber (Space Shuttle pp. 1, 15, 135) This flight is fundamentally similar to the
boost-glide profile. Because of this, an ascent directly to a 222km by 55km deorbit trajectory is feasible.
The best place to deorbit a Delta Glider from a Low Energy Orbit is directly over the targeted landing site. The
best location to deorbit a Shuttle is on the other side of the world (which in this case would be Australia.) Both cases
involve the performance of the spacecraft, more specifically its hypersonic lift to drag ratio. The Apollo Command Module
gets 0.8 (or 0.8:1 in the long form), while Soyuz and Delta Sprint get 0.5. Straight wing proposals for the Space Shuttle
get 0.56. This ratio is not yet available for SpaceShipOne, but she too follows the ballistic type of entry profile,
entering gliding flight once at low speeds, as the straight wing Shuttle proposals do, and as Delta Sprint does under
its parasol. Below a lift-to-drag of 1.0, the ship will basically drop through the atmosphere more than flying.
Above a lift-to-drag of 1.0, the character of the entry begins to change to a gliding profile.
The Space Shuttle has about 1.7, allowing an entry glide of about 8000km, while Delta Glider has an average lift to drag
of about 3.75, allowing about 24000km of gliding distance from entry interface.
Briefly, the generic terms for the "top" and "bottom" of an orbit are "apoapsis" and "periapsis," collectively known
as "apsides." Books you may have read almost certainly will have used the terms "apogee" and "perigee", which are specific
to Earth. There are scores of other similar terms for the various bodies in the solar system, but they all follow the
convention "apo-somethingorother" and "peri-somethingorother." "Apoapsis" and "periapsis" are generic and can be used
for any planet, which is why I prefer them. The apoapsis of an orbit is the highest point (most distant from the center
of the body being orbited, in this case, earth), while periapsis is the lowest point. They are always on opposite sides
of the body being orbited.
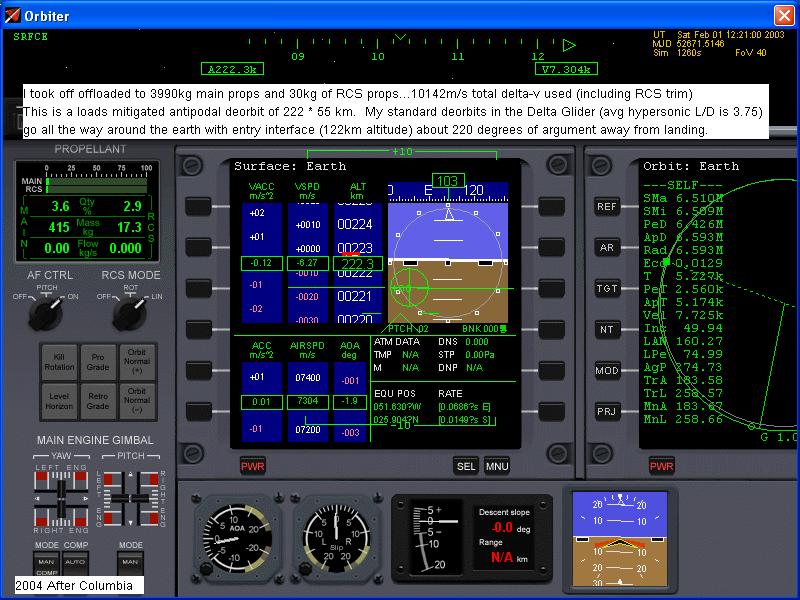
In the instument view above, under "Orbit: Earth", the orbital parameters of my Delta Glider are described. The
"222 * 55 km" note I have added within the picture are calculated from Orbiter's modelled earth radius of 6,371km. The
specifics, if you are interested, are described in Orbiter's manual, which comes with the download and is located in the "doc"
folder as "orbiter.pdf" (If you are planning to fly Orbiter, I'd recommend familiarizing yourself with the whole thing before
trying to fly this mission.) The standard periapsis for a Shuttle deorbit is -80km. This means that if the atmosphere
and ground didn't interfere, the Shuttle would pass 80km below sea level, while my Delta Glider would remain at 55km altitude.
In either case, the atmosphere will override these parameters before they are reached. As a result, they are not true
orbits, but what are called "deorbits" or "trajectories"...often "deorbit trajectories."
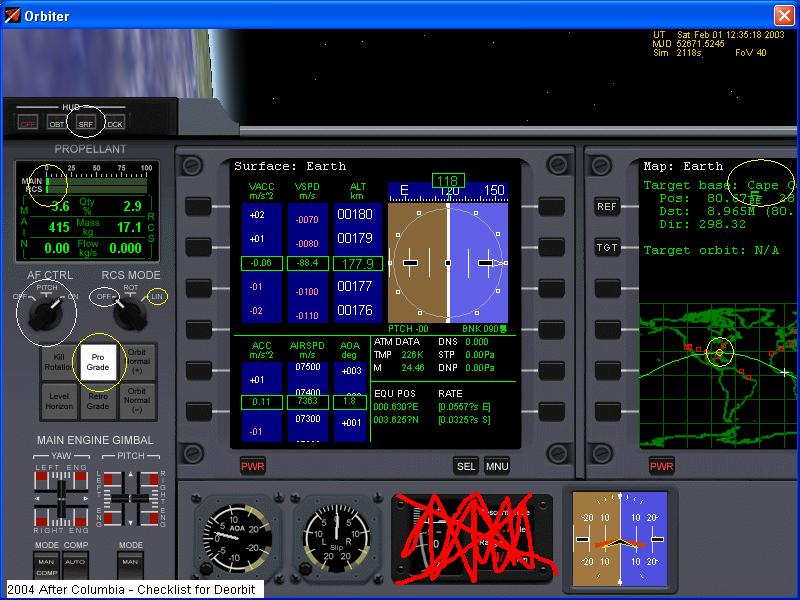
We will now go into the Delta Glider's comparatively simple deorbit and entry checklists. Yellow circles denote
deorbit checklist items, which are set prior to the deorbit maneuver, while white circles are set prior to doing entry maneuvers.
Entry maneuvers (such as rolling) are ineffective until a dynamic pressure of 0.2kPa (4.17 psf). You must complete the
entry checklist by this point.
|
| Here the Descent Slope indicator is vandalized because it is useless...why it is there is a mystery. |
Deorbit Checklist:
1. Expend propellants to minimize entry mass if desired (this is an absolute necessity for Shuttle for complicated reasons,
not the least of which is that they pose a danger to ground crews after landing.)
2. Set autopilot to Prograde. This will place the Delta Glider rolled left 90 degrees and 0 degrees pitch, producing
a consistent and controllable attitude (Shuttle: On the GPC keypad, press OPS 3 0 2 PRO to load deorbit guidance
software. Set attitude mode to AUTO, press ITEM 2 7 to establish deorbit burn attitude, which is a roll 180 degrees,
yaw of 180 degrees and a pitch of -7 degrees; upside down, backwards and nose slightly towards the sky.)
3. Select RCS mode to Linear, which will allow the deorbit burn. (Shuttle: complicated checklist for arming OMS and RCS.)
4. Select the Map MFD using Shift-M, and Select Cape Canaveral using Shift-T. Before initiating the deorbit burn,
confirm that your orbital plane (yellow wave) is within half a map box of the selected target, and your position (white cross)
is close to being over the site (Shuttle, handled by computers and Mission Control; note that the white cross is well past
the Cape, as this screenshot was taken after the deorbit maneuver.)
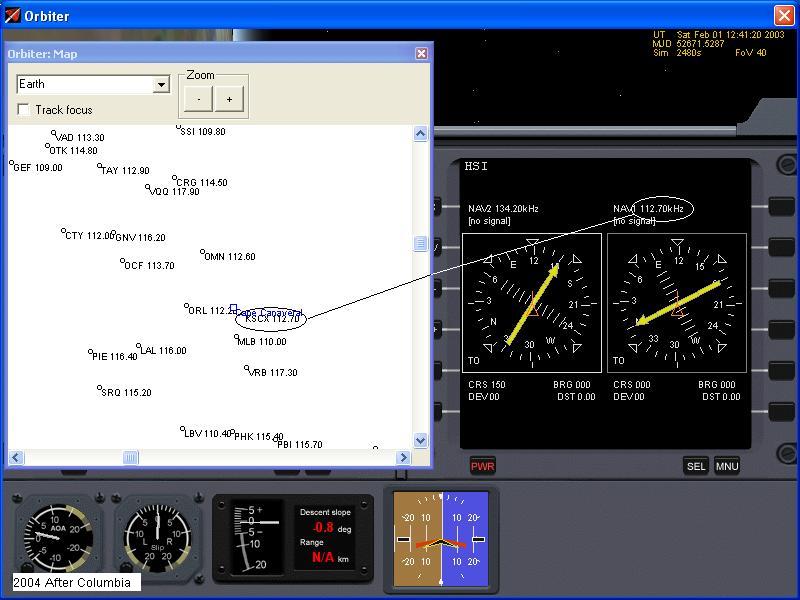
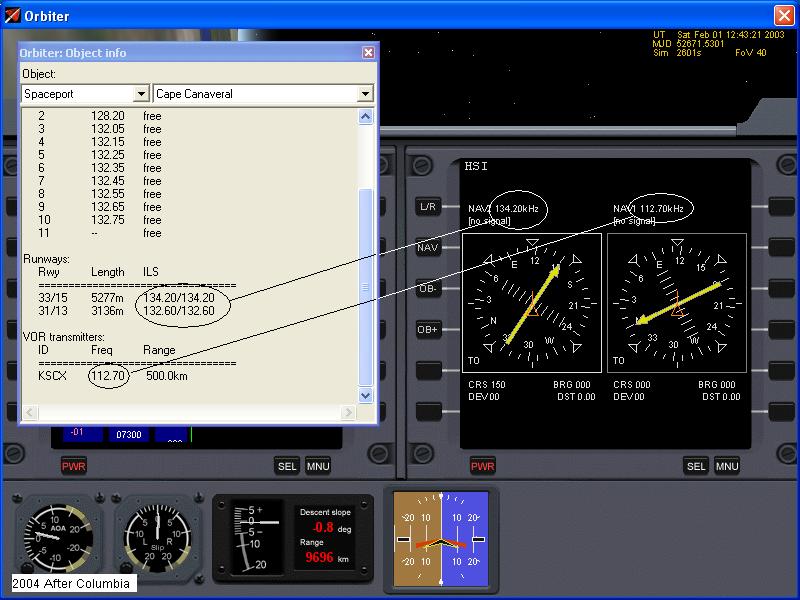
5. Set ILS VOR communications frequencies for the target landing site. The map containing VOR beacons is available
through the F4 menu. The Object Info window, which contains spacecraft and ground base transponder frequencies is also
available from the F4 menu. (Shuttle controller configuration is a complicated multi page checklist.)
Procedure for executing deorbit maneuver (on Shuttle, the maneuver is executed by the guidance computer; I don't know
what the key sequence is.)
1. Open the Orbit MFD using Shift-O, set Projection to Self using Shift-P, and set it to show the orbital parameters
as numbers using Shift-M
2. Disengage the Prograde Autopilot by pressing its key either on the sceen panel or the keyboard ('[') If this
is not done, the autopilot will introduce attitude errors as it is not designed to be used with Linear RCS mode.
3. Confirm RCS mode is linear via the panel rotational switch or '/' key.
4. Observe PeD on the Orbit MFD. Engage -X translation by pressing '9' PeD should decrease.
5. Disengage RCS when PeD reads "6.426M" indicating a 55km periapsis (6.371M is the radius of the Earth.)
6. Engage Prograde autopilot to maintain entry attitude.
|